Photoshop Support - Main Photoshop News Photoshop Tutorials Photoshop Tools Photoshop Resources Photoshop Site Map
photoshop tutorials


photoshop total training - top logo
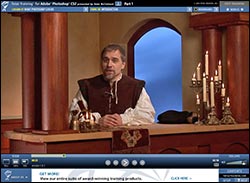
Total Training For Photoshop CS2

Video tutorials from Total Training for Photoshop CS2, CS, and Elements 3.
back to resources
Buy. Download. Create. Get Photoshop CS4 now at the Adobe Store.
Try before you buy. Download any Adobe product for a free 30 day trial.


Total Training For Photoshop CS2
Total Training For Photoshop CS2Hosted by Deke McClelland
Published by Total Training ($299.99 USD)
Level: Beginner Through Advanced
Running Time: 21 Hours 50 minutes, 3 DVDs (ROM)
Project Files: Included
Extras: Free Bonus Lessons
[view sample clips, see full index]
review by Eric Martin

Exclusive 20% Discount On Select Total Training Products & Bundles
To redeem our exclusive discount coupon, use promotion code save20pss in your shopping cart. You could save hundreds of dollars. Use this special link to see the full offer.

The Whole Enchilada
In 2005 Photoshop turned 15 years old, and Photoshop CS2, or Photoshop 9, is jam-packed with so much good stuff you are definitely going to be need help that is both simple and easy to understand.

Total Training For Photoshop CS2, hosted by Deke McClelland, fits the bill. This is one of the most comprehensive training packages I have come across. How comprehensive? Just have a look at the full index below. I don't think that the people at Total Training have left anything out, which is good news to anyone who is serious about tackling Photoshop. As Photoshop keeps adding more power and features with each upgrade, it has turned into a real monster with a very steep learning curve. Consider this: Photoshop CS2 now includes a mind-boggling 494 menu commands.

That's where Total Training comes in. With their super user-friendly interface and their smart chapter-based DVDs, it is easy to locate a Photoshop lesson and then enjoy the instant gratification of learning it fast and learning it right. And you're in good hands with Deke McClelland, who is an industry-recognized Adobe expert, and who has a real talent for making the more complex and abstract features of this immense program understandable to a new user.

Over 21 Hours Of Training
You start the training by installing all the project files you'll need to complete the lessons, as well as a copy of trainer Deke McClelland's own Photoshop presets. This configures your copy of Photoshop CS2 to be the same as Deke's, and is recommended to make following along easier. If you are concerned about changing your personal settings in Photoshop, you can skip this part of the installation process and return to it later.

Total Training's interface has always been super user-friendly, and now it is even better with new 2x and 4x fast-forward buttons, which are a real time-saver when searching through a previously-viewed lesson for a specific segment.

And So It Begins
The training lessons begin with a clip called "What Photoshop Can Do," which gives you a taste of the power of Photoshop by showing you how to use simple masking techniques to merge portions of one image into the background of another, as well as how to correct colors in an image, and how to sharpen an image. This is a good basic overview.
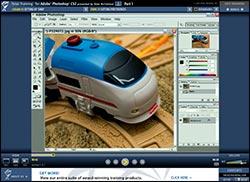
Total Training For Photoshop CS2Once that's over you're invited to dive into Photoshop and learn it inside out.

New Photoshop users who spend the time to go through all the early lessons will have a better understanding of the program. In particular, care is given to the way that Photoshop should be setup.

Dealing with Photoshop's preferences, where color management and others settings are selected, is a daunting task for most new users. Deke walks you through the various settings and makes sure to explain the options clearly.

Being familiar with Photoshop, I was most interested in the new features in CS2. One of them is Adobe Bridge, and the lessons here helped enormously in understanding how to use this new tool in a workflow. There are some very good tips in this section as well, including how to color manage all your Creative Suite applications in one step using Adobe Bridge.

I did find that some of the lessons were a little long-winded — fluffed up with unnecessary chitchat — and I had wished they had cut to the chase. (When you need to find out how something works, you become very impatient of extraneous information.)

For Digital Photographers - Camera Raw & Bit Depth Lessons
If there is one thing that new users to Photoshop feel mixed up and confused about, it is Camera Raw. All digital photographers will benefit from learning how to use Camera Raw, and the lessons here cover all the basics, as well as highlighting some advanced Camera Raw options. Deke also shares some simple techniques and tips that can make Camera Raw photos look stunning.

This section ends with lessons that focus on high bit depth, and explanations of how to work with HDR (High Dynamic Range), which is a new feature of Photoshop CS2 with which digital photographers are also going to want to become familiar.

Advantages Of Video Training
The real advantage of video training is being able to pause, review a portion of the lessons again, and then continue to the next lesson. And if one of them has no interest to you, you can just skip it and come back to it later when you find you need the information for a project that demands it.

Because there is so much to learn here, and so many topics and lessons, I would recommend not trying to watch all of this at once. First of all it would take you over 21 hours, and that's without accounting for naps or food breaks.

Once you've gotten through the introductory lessons, you should skip around and find areas that you are most interested in. The indexed tutorials in the Quick Reference Guide (see it below) will give you an overview of all the topics covered, along with the lesson titles and running times.

The Bonus Lessons
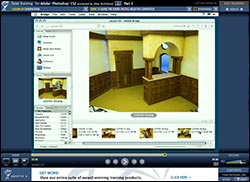
Total Training For Photoshop CS2At the end of the training (Disc 3) there are 2 more additional chapters, called Bonus Lessons, which focus on the new Vanishing Point tool (see sample clip), and Smart Objects. If you're already CS-trained you might want to jump right to this bonus area, because these are amazing tools and Deke has you working with them quickly.

To view the bonus tracks you'll have to register your product on the Total Training website. Once you've done that you'll be given an unlock code. These extra lessons add an additional hour of training to the package, and as I mentioned, these are very cool Photoshop tools, so make sure to unlock and view this bonus material.

Summary
Because of it's scope (over 21 hours) and its pricing ($299) this package is obviously targeted to the new Photoshop user. But even for pro users I consider this package to be a good value.

One reason is Total Training's superior production quality and their attention to detail, which makes this a great teaching tool for anyone needing to get to the new stuff fast, and it will be especially beneficial to design shops who can use it to train their teams.

This is an all-inclusive, user-friendly, professional training package that will be of great benefit to both Photoshop beginners and experts alike.

©2005 Eric Martin & PhotoshopSupport.com

Exclusive 20% Discount On Select Total Training Products & Bundles
To redeem our exclusive discount coupon, use promotion code save20pss in your shopping cart. You could save hundreds of dollars. Use this special link to see the full offer.

Buy A Bundle - Save A Bundle - 20% Discount On Total Training Products
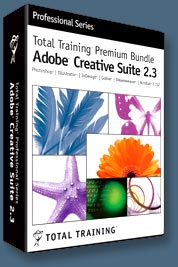
Exclusive 20% Discount On Select Total Training Products & BundlesTotal Training has given us an exclusive 20% discount coupon, and we've been told that this coupon can also be applied to the already heavily discounted Creative Suite 2 Premium Edition Bundle.

This bundle of DVDs teaches pro level tips and techniques for Photoshop CS2, InDesign CS2, Illustrator CS2, GoLive CS2, and Acrobat 7. Regulary priced at $1,179.94, it's on sale right now for $449.99, saving you $729.95, and when you add on our coupon you save an extra $90.

To redeem our exclusive discount coupon, use promotion code save20pss in your shopping cart and you'll receive a full 20% discount on this already crazy price, so that the entire CS2 Bundle (10 DVDs) costs you only $359.99. This bundle has over 88 hours of training.

Use this special link to see the full offer.
back to top

TOTAL TRAINING FOR PHOTOSHOP CS2 - SAMPLE CLIPS
The following sample clips are from Total Training For Photoshop CS2, hosted by Deke McClelland. For more product details visit the Total Training website.

Vanishing Point
In this clip you'll learn how to draw a grid that matches the perspective of your photograph, and how to set new source points and then clone and paint inside the grid.
See the Total Training CS2 "Vanishing Point Tool" video tutorial.

Camera RAW
In this clip you'll learn how to correct a very dark image, and how to use the new Auto Correction settings in Camera RAW CS2.
See the Total Training CS2 "Camera RAW" video tutorial.
back to top

TOTAL TRAINING FOR PHOTOSHOP CS2 - FULL INDEX

Program 1
1. What Photoshop Can do (26 min)
Lesson 1: Introducing Adobe Photoshop CS 2
Lesson 2: Moving a Selection from One Image into Another
Lesson 3: Correcting Colors
Lesson 4: Fixing Details with the Clone Stamp Tool
Lesson 5: Using Adjustment Layers
Lesson 6: Sharpening the Focus
Lesson 7: Creating a Dramatic Sky & Cropping the Image
Lesson 8: Text Effects

2. The Bridge (33 min)
Lesson 1: Introducing the Adobe Bridge
Lesson 2: Using the Lightbox & Thumbnail View
Lesson 3: Using the Filmstrip View
Lesson 4: Viewing Thumbnail Metadata & Labeling
Lesson 5: Showing Off New Features
Lesson 6: Managing Your Images
Lesson 7: File Naming Inside the Bridge
Lesson 8: Workspaces, Location Tracking & Slide Shows

3. Setting up 'Shop (24 min)
Lesson 1: Setting Preferences
Lesson 2: Choosing Color Settings
Lesson 3: Choosing Creative Suite Color Settings
Lesson 4: Customizing Keyboard Shortcuts
Lesson 5: Organizing Palettes & Saving Workspaces

4. Navigation and Resolution (32 min)
Lesson 1: Zooming an Image
Lesson 2: Scrolling & Panning
Lesson 3: Changing Resolution & Image Size
Lesson 4: Upsampling an Image
Lesson 5: Downsampling an Image
Lesson 6: Using the Navigator Palette
Lesson 7: Customizing Your View

5. Rotate and Crop (22 min)
Lesson 1: Introducing the Crop Tool
Lesson 2: Cropping with the Crop Tool
Lesson 3: Cropping with the Marquee Tool
Lesson 4: Automating Crop & Straighten
Lesson 5: Straightening with the Measure Tool
Lesson 6: Cropping with Perspective

6. Basic Color Correction (33 min)
Lesson 1: Introducing Variations
Lesson 2: Adjusting Color with Variations
Lesson 3: Correcting Color with Variations
Lesson 4: Using the Fade Command
Lesson 5: Modifying Colors with Hue/Saturation
Lesson 6: Specifying Colors in Hue/Saturation
Lesson 7: Selecting Color Ranges in Hue/Saturation

7. Red Eye Removal and Recolor (19 min)
Lesson 1: Correcting Red Eye
Lesson 2: Using the Red Eye Tool
Lesson 3: Recoloring with the Brush Tool
Lesson 4: Using the Color Replacement Tool

8. Painting with the Edit Tools (32 min)
Lesson 1: Introducing the Dodge Tool
Lesson 2: Introducing the Burn Tool
Lesson 3: Introducing the Sponge & Focus Tools Lesson 4: Using the Dodge Tool
Lesson 5: Using the Burn Tool
Lesson 6: Working with the Sponge Tool
Lesson 7: Pushing Pixels with the Smudge Tool

9. Clone, Heal, and Patch (33 min)
Lesson 1: Introducing the Clone Stamp Tool Lesson 2: Compositing with the Clone Stamp Tool Lesson 3: Using the Spot Healing Brush Tool Lesson 4: The Healing Brush & the Options Bar Lesson 5: Healing & Fading
Lesson 6: Creating Textures & Patterns
Lesson 7: Using the Patch Tool

10. Using the Selection Tools (36 min)
Lesson 1: Introducing the Selection Tools Lesson 2: Using the Magic Wand Tool
Lesson 3: Exploring Magic Wand Options
Lesson 4: Using the Grow & Similar Commands Lesson 5: Selecting with the Polygonal Lasso Tool Lesson 6: Selecting with the Marquee Tool Lesson 7: Saving & Loading a Selection Outline Lesson 8: Making a Composite
Lesson 9: Adding a Drop Shadow
Lesson 10: Cleaning Up a Selection Edge

11. Selecting with Color Range (19 min)
Lesson 1: Selecting Translucency
Lesson 2: Darkening with the Multiply Blend Mode Lesson 3: Defining a Color Range
Lesson 4: Selecting Image Highlights
Lesson 5: Compositing Highlights into an Image

12. Making the Most of History (25 min)
Lesson 1: Modifying an Image Using Variations Lesson 2: Using Undo
Lesson 3: Using the History Brush
Lesson 4: Understanding History States
Lesson 5: Fixing Saved Files
Lesson 6: Choosing History Options
Lesson 7: Saving Snapshots

Program 2
1. Introducing Layers (41 min)
Lesson 1: Customizing the Layers Palette
Lesson 2: Creating a Layer Via Copy
Lesson 3: Using the Spherize Command & the Eraser Tool
Lesson 4: Moving Layers in the Canvas
Lesson 5: Blending Layers
Lesson 6: Creating a Clipping Mask
Lesson 7: Changing the Layer Order
Lesson 8: Using the Fade Command
Lesson 9: Using a Levels Adjustment Layer
Lesson 10: Activating a Layer & Making a Composite
Lesson 11: Resizing the Canvas
Lesson 12: Feathering a Selection to Create a Vignette

2. Groups and Comps (37 min)
Lesson 1: Introducing Layer Groups & Comps Lesson 2: Applying Gaussian Blur & Deleting Layers Lesson 3: Merging Layers
Lesson 4: Creating a Hue/Saturation Adjustment
Layer Lesson 5: Working with Layer Groups
Lesson 6: Creating a Repeating Pattern
Lesson 7: Modifying a Layer Comp
Lesson 8: Creating a New Layer Comp

3. Opacity and Blend Modes (39 min)
Lesson 1: Introducing Opacity & Blend Modes Lesson 2: Adjusting Layer Opacity
Lesson 3: Adjusting the Fill Value
Lesson 4: Understanding Last Document State
Lesson 5: Introducing Blend Modes
Lesson 6: Using the Normal & Dissolve Blend
Modes Lesson 7: Using the Darkening Blend
Modes Lesson 8: Changing Blend Modes with Keyboard Shortcuts
Lesson 9: Using the Lightening Blend Modes
Lesson 10: Using Overlay through Hard Mix Blend Modes Lesson 11: Using Difference through Luminosity Blend Modes Lesson 12: Applying Motion Blur to a Text Layer Lesson 13: Updating Layer Comps

4. Advanced Blending (37 min)
Lesson 1: Introducing Advanced Blending
Lesson 2: Creating a Lens Flare
Lesson 3: Merging Layers with Screen Mode Lesson 4: Preserving Keyboard Shortcuts for Mac Dock Lesson 5: Previewing Free Transform
Lesson 6: Merging Blend Modes
Lesson 7: Adding a Logo Element
Lesson 8: Grouping & Naming Layers
Lesson 9: Creating Knockouts
Lesson 10: Using the Luminance Blend Mode Lesson 11: Colorizing a Layer
Lesson 12: Creating a Knockout from a Layer

5. Layer Styles (49 min)
Lesson 1: Introducing Layer Styles
Lesson 2: Colorizing an Individual Group Using Blend Modes Lesson 3: Selecting Layers with Keyboard Shortcuts Lesson 4: Applying a Drop Shadow to a Layer Lesson 5: Creating a Directional Inner Glow Using Inner Shadow Lesson 6: Adjusting Layer Colors
Lesson 7: Duplicating Layer Effects
Lesson 8: Working with the Layers Palette Lesson 9: Transparency Masking & Painting with Layer Styles
Lesson 10: Enabling Layer Masks & Effects
Lesson 11: Adjusting Opacity & Fill inside Layers
Lesson 12: Saving & Applying a New Layer Style

6. Masks and Channels (52 min)
Lesson 1: Selecting an Image with the Magic Wand Tool
Lesson 2: Using the Channels Palette & Mixing Channels
Lesson 3: Choosing a Blend Mode Best Suited for a Mask
Lesson 4: Using the Variations Tool to Improve a Mask
Lesson 5: Fixing the Edge of a Mask Using Inner Glow
Lesson 6: Selecting a Color Channel Best Suited for a Mask
Lesson 7: Adjusting Levels in a Color Channel
Lesson 8: Using the Dodge & Burn Tools to Make a Mask
Lesson 9: Inverting & Combining Channels for Mask Edges
Lesson 10: Changing the Color of the Rebuilt Overlay
Lesson 11: Fixing Masks with the Brush Tool Lesson 12: Compositing a Masked Image into Another Background
Lesson 13: Matching the Color Temperature of Images
Lesson 14: Fixing Mask Edges with Inner Shadow

7. Transform and Warp (51 min)
Lesson 1: Introducing Transformations
Lesson 2: Masking with the Levels Command
Lesson 3: Using Free Transform
Lesson 4: Duplicating Transformations
Lesson 5: Transforming Selections
Lesson 6: Masking with the Calculations Command
Lesson 7: Warping an Image
Lesson 8: Modifying an Image with a Layer Mask
(continued...)

(continued from previous...)

8. Creating and Editing Type (32 min)
Lesson 1: Working with the Pen Tool
Lesson 2: Introducing Text
Lesson 3: Editing Text
Lesson 4: Creating Point & Area Text
Lesson 5: Modifying Existing Text
Lesson 6: Modifying Multiple Text Layers at Once
Lesson 7: Using Advanced Formatting Options

9. Special Type Effects (42 min)
Lesson 1: Checking Spelling in a Type Layer
Lesson 2: Warping & Transforming Text
Lesson 3: Working with Text on a Path
Lesson 4: Applying Effects to Text on a Path
Lesson 5: Placing Text inside a Path
Lesson 6: Using Advanced Text Formatting
Lesson 7: Adjusting Leading
Lesson 8: Adjusting Kerning

10. Vector-based Shapes (50 min)
Lesson 1: Resolving Font Issues
Lesson 2: The Advantages of Vector-Based Shapes
Lesson 3: Introducing the Vitruvian Man & Shapes
Lesson 4: Introducing the Shape Tools & Fill
Lesson 5: Applying a Stroke Layer Effect
Lesson 6: Using the Exclude Overlapping Command
Lesson 7: Modifying a Shape Using the Arrow Tools
Lesson 8: Intersect, Subtract, Add & Combine Path Components
Lesson 9: Working with the Polygon Tool
Lesson 10: Deleting Paths & Drawing a Gradient Arrow
Lesson 11: Working with Custom Shapes
Lesson 12: Creating a Custom Shape

11.Printing and Output (29 min)
Lesson 1: Using the Print with Preview Command
Lesson 2: Exploring Output Options
Lesson 3: Managing Color
Lesson 4: Using the Printer Dialog Box
Lesson 5: Using the Contact Sheet II Command
Lesson 6: Creating a Picture Package
Lesson 7: Creating a Web Photo Gallery

12. Actions (32 min)
Lesson 1: Introducing Actions
Lesson 2: Creating a Custom Action
Lesson 3: Modifying an Action
Lesson 4: Playing an Action
Lesson 5: Loading & Saving Actions
Lesson 6: Deleting & Adding Steps in an Action
Lesson 7: Applying a Gradient Map
Lesson 8: Correcting Anti-Aliasing
Lesson 9: Adding a Drop Shadow
Lesson 10: Testing an Action
Lesson 11: Final Comments & Credits

Program 3
1. Adjusting Levels (30 min)
Lesson 1: Using the Brightness/Contrast Command
Lesson 2: Adjusting Levels Automatically
Lesson 3: Using the Auto Commands
Lesson 4: Working with the Levels Command
Lesson 5: Adjusting Individual Color Channels
Lesson 6: Fixing Washed Out Colors

2. Curves, Shadows, & Highlights (42 min)
Lesson 1: When Levels Won't Do
Lesson 2: Introducing Curves
Lesson 3: Using the Histogram Palette
Lesson 4: Adjusting Values in Curves
Lesson 5: Balancing Color in Curves
Lesson 6: Making Final Corrections
Lesson 7: Working with the Pencil Tool
Lesson 8: Using the Shadow/Highlight Command
Lesson 9: Using the Advanced Shadow/Highlight Options

3. Adjustment Layers (33 min)
Lesson 1: Pasting an Image into a Selection
Lesson 2: Using a Photo Filter Adjustment Layer
Lesson 3: Affecting an Adjustment Layer with a Gradient Mask
Lesson 4: Using a Levels Adjustment Layer
Lesson 5: Creating an Adjustment Layer without a Layer Mask
Lesson 6: Adding a Layer Mask or a Vector Mask
Lesson 7: Using a Gradient Map Adjustment Layer
Lesson 8: Using an Inverse Adjustment Layer
Lesson 9: Assigning a Shortcut for a Levels Adjustment Layer

4. Camera Raw (34 min)
Lesson 1: Using the Adobe Digital Negative Converter
Lesson 2: Working inside the Camera Raw Dialog Box
Lesson 3: Making Color Adjustments
Lesson 4: Modifying Levels
Lesson 5: Using the Detail & Lens Tabs
Lesson 6: Using the Curve & Calibrate Tabs
Lesson 7: Using Advanced Camera Raw Options

5. High Bit Depth and Exposure (41 min)
Lesson 1: Understanding Bit Depth
Lesson 2: Comparing 8 & 16 Bit Grayscale Ranges
Lesson 3: Using an Amalgam Mask to Isolate Grays
Lesson 4: Comparing 8 & 16 Bit File Types & Sizes
Lesson 5: Getting Ready to Merge Images
Lesson 6: Using the Image Processor to Convert Camera Raw to JPEG
Lesson 7: Performing an HDR Exposure Merge
Lesson 8: Adjusting the Exposure in an HDR Image
Lesson 9: Converting from HDR to 16 Bit

6. Sharpening Focus (47 min)
Lesson 1: Introducing the Sharpen Filters
Lesson 2: Using Unsharp Mask
Lesson 3: Understanding How Unsharp Mask Works
Lesson 4: Sharpening a Low Quality JPEG Image
Lesson 5: Fading & Blending Unsharp Mask
Lesson 6: Introducing Smart Sharpen
Lesson 7: Correcting a Lens Blur with Smart Sharpen
Lesson 8: Correcting Motion Blur with Smart Sharpen

7. Blurring and Averaging (58 min)
Lesson 1: Using Gaussian Blur
Lesson 2: Using the Median & Dust & Scratches Filters
Lesson 3: Creating Box & Surface Blurs
Lesson 4: Using Smart Blur
Lesson 5: Creating Lens & Shape Blurs
Lesson 6: Creating Motion & Radial Blurs
Lesson 7: Removing Stray Hairs Using Median
Lesson 8: Painting a Blur inside of a Layer Mask
Lesson 9: Reducing Noise & Restoring Highlights
Lesson 10: Removing JPEG Artifacts
Lesson 11: Creating Clouds & Adding a Gradient
Lesson 12: Creating Stars Using the Add Noise Filter
Lesson 13: Averaging Colors

8. Filters and Masks (38 min)
Lesson 1: Using the Lens Blur Filter
Lesson 2: Using a Gradient as a Depth Mask
Lesson 3: Blending Channels to Create a New Mask
Lesson 4: Using a Mask to Create a Depth of Field Effect
Lesson 5: Looking at Different Sharpening Results
Lesson 6: Applying Multiple Filters to a Layer
Lesson 7: Creating an Edge Mask to Sharpen an Image
Lesson 8: Applying Smart Sharpen to an Edge Mask

9. Distort and Displace (46 min)
Lesson 1: Using the Spherize Filter
Lesson 2: Using the Pinch Filter
Lesson 3: More Distortion Wackiness
Lesson 4: Making a Lens Correction
Lesson 5: Introducing Displacement Maps
Lesson 6: Understanding Displacement Maps
Lesson 7: Using the Displace Filter
Lesson 8: Creating a Displacement Map
Lesson 9: Making Someone Thinner with a Displacement Map

10. Liquify (35 min)
Lesson 1: Introducing the Liquify Filter
Lesson 2: Using the Show Backdrop Options
Lesson 3: Setting Brush Options
Lesson 4: Warping Images with the Forward Warp Tool
Lesson 5: Viewing Wireframes with the Show Mesh Command
Lesson 6: Warping with Other Liquify Tools
Lesson 7: Restoring & Masking Warped Images
Lesson 8: Creating a Superhero Face Using the Liquify Tools
Lesson 9: Using the Reconstruct Tool to Restore Details
Lesson 10: Saving & Reloading Wireframe Meshes

Bonus Lessons
11. Vanishing Point (36 min)
Lesson 1: Introducing the Vanishing Point Filter
Lesson 2: Selecting in Perspective with the Marquee Tool
Lesson 3: Cloning in Perspective with the Stamp Tool
Lesson 4: Compositing Images Using Vanishing Point
Lesson 5: Using Copy Merged in Vanishing Point
Lesson 6: Fixing Edges with a Black Outer Glow
Lesson 7: Working with Text in Vanishing Point

12. Smart Objects (34 min)
Lesson 1: Introducing Smart Objects
Lesson 2: Creating a Smart Object
Lesson 3: Dynamically Transforming Smart Objects
Lesson 4: Introduction to Updating Smart Objects
Lesson 5: Changing the Color of a Transparency Pattern
Lesson 6: Replacing & Updating Smart Objects
Lesson 7: Importing Vector Smart Objects
Lesson 8: Pasting Illustrations as Smart Objects
Lesson 9: Importing a Camera Raw Image as a Smart Object
Lesson 10: Final Comments & Credits

back to top


PHOTO CREDIT: Product shots & logo (© Total Training) plus blur on color pools.
© 2004 Eric Martin of Futura Studios


photoshop tutorials - sidebar logo
search the Photoshop Support site
Adobe Photoshop Blog - Photoshop news and comments
Photoshop Blog
News, links and tips.
Adobe Photoshop Blog - Receive Updates via our XML/RSS feed
Inspiring Photoshop Music...
join our Photoshop Newsletter and win free prizes
Free Newsletter
Free monthly prizes.
Fluid Mask Photoshop Plugin
Fluid Mask - $10 Off
Fluid Mask Tour
Free Dreamweaver Tutorials and Dreamweaver Templates - Resource Center - Main Page
DW Center - Main
DW Free Tutorials
DW Video Clips
DW Templates
Free Flash Tutorials and Flash Templates - Resource Center
Flash - Main
Flash Tutorials
Flash Templates
Photoshop software & gear at special prices
Photoshop Deals
Photoshop specials.
Turn your Photoshop designs into CSS websites with SiteGrinder - Photoshop plugin.
Turn your Photoshop
designs into websites
with SiteGrinder
Photoshop CS3 Resources - Photoshop 10 news
Photoshop CS3
PS CS3 Tutorials
Adobe Photoshop Elements - resource center
PSE Main Page
PSE Free Tutorials
PSE Free Clips
Lightroom Resource Center - Adobe Lightroom tutorials and news
Lightroom - Main
LR Free Tutorials
LR Resources
Apple Aperture resource center - Aperture tutorials and news
Aperture - Main
Aperture Tutorials
Aperture Reviews
Photoshop Resources
Photoshop Tutorials
Free Tutorials
Photoshop 9 - CS2
Free CS2 Tutorials
Photoshop Brushes
Free Brushes
Photoshop Plugins
Free Plugins
Photoshop Actions
Free Actions
Photoshop Training
Free Video Clips
Free Stock Photos
Free Photos
Free Fonts Directory
Free Fonts
Free Textures
Free Textures
Digital Cameras
Resource Center
Inspiration
Websites & Artists
Photoshop News
Latest News
Photoshop Books
Latest Releases
Color Resources
Color Management
Just For Kids
Photoshop for Kids
How-To Articles
Photoshop Articles
GoLive Site
GoLive Tutorials
Quick Answers
Photoshop FAQ
Get In Touch
Feedback Form
© 1999-2005 PHOTOSHOPSUPPORT.COM
ALL RIGHTS RESERVED - MAY NOT BE REPRODUCED WITHOUT PERMISSION
Some material reproduced by permission of copyright owners
All trademarks mentioned are the property of their respective owners
[this website is intended as a public service]
• navigation bar inspired by Griffin Technology
• website design and development by Futura Studios
web hosting provided by Hostway •